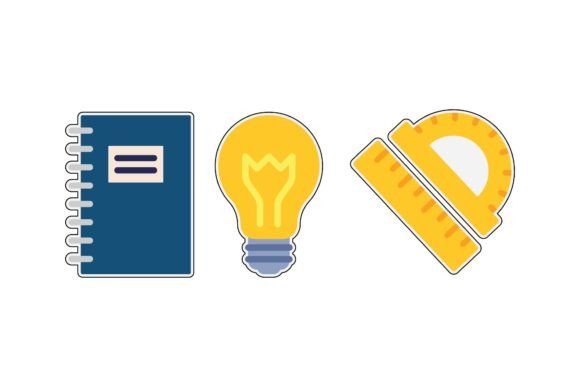
School Sticker Set: A Designer’s Real-World Embroidery Review
First Impressions: Playful, Clean, and Surprisingly Versatile
When I opened the School Sticker Set, my immediate thought wasn’t “cute school clipart”—it was “this could actually work on a linen tea towel, a cotton baby onesie, or even a structured denim tote.” The illustrations feel intentionally simplified—not overly detailed, not cartoonishly exaggerated—striking that rare balance where charm doesn’t sacrifice stitchability. You’ll find chalkboards, pencils, apples, rulers, and open books rendered with soft edges, consistent line weight, and generous negative space. That spacing matters: it gives breathing room for satin stitches to lay flat and prevents fill areas from becoming muddy on lightweight fabric.
A Real Project Test: Embroidering a Back-to-School Tote for a Local Boutique
Last week, I used one of the apple motifs from the School Sticker Set to embroider a 9” x 10” organic cotton tote for a neighborhood children’s boutique. I chose the SVG file (converted cleanly to my embroidery software), resized it to fit a 4” hoop, and stitched it using a medium-weight cutaway stabilizer. The result? Crisp outlines, smooth satin-stitched curves, and zero thread nesting—even at the stem’s narrow tip. Customers loved the handmade warmth; several asked if it came in matching pillow covers (a yes, thanks to the set’s cohesive style). This isn’t just decoration—it’s a quiet brand signal: thoughtful, educational, and proudly hand-finished.
Where It Shines—and Where to Pause
The School Sticker Set performs best on stable, medium-weight fabrics: canvas totes, twill aprons, brushed cotton sweatshirts, and quilting-weight tea towels. Its clean shapes translate beautifully into embroidered patch applications—especially when backed with iron-on fusible webbing before stitching. For custom apparel, it holds up well on crewnecks and raglan tees, especially when placed on the left chest or sleeve cuff.
That said, tread carefully on highly textured or stretchy surfaces. On ribbed knit caps or jersey baby bodysuits, the finer details—like tiny pencil erasers or chalkboard grid lines—can blur or distort without precise tension control and extra stabilizing. Also, avoid scaling the designs below 2.5” unless you’re confident in your machine’s ability to render small lettering or tight corners cleanly. Dense fill areas (like solid apple cores) may require reduced stitch density on delicate fabrics like voile or thin chambray.
Dark Fabric? Light Fabric? Contrast Is Key
I tested the same apple design on black canvas and ivory linen. On dark fabric, I switched to bright white or lemon-yellow thread—suddenly, it popped like a vintage classroom poster. On light fabric, navy or forest green thread gave it grounded, timeless appeal. The School Sticker Set’s simplicity makes it incredibly adaptable to thread colors, but don’t assume default settings will do. Always run a test stitch on scrap fabric first—especially when planning personalized gifts or small shop product batches.
Commercial Use & Craft Business Reality Checks
If you’re an Etsy seller, craft fair vendor, or digital product seller, here’s what matters: the School Sticker Set is listed as Graphics within the Illustrations category—and while it includes AI, EPS, SVG, JPG, and PNG files, none of those formats are inherently embroidery-ready. You’ll need to digitize each motif yourself (or hire a digitizer) for true machine embroidery design use. The 1920 px × 1280 px canvas gives plenty of resolution headroom, but remember: pixel clarity ≠ stitch clarity. A sharp JPG doesn’t guarantee clean satin stitch transitions.
Before listing embroidered items for sale—or bundling these as design assets—verify licensing terms. The listing says “We guarantee,” but doesn’t specify commercial rights. When in doubt, contact the seller directly. Nothing undermines customer trust faster than a takedown notice on your best-selling back-to-school apron collection.
Design Notes Every Embroidery Professional Should Run Through
- Test on scrap fabric first—especially with textured or dark materials.
- Review stitch density in your digitized version; reduce fill density by 10–15% for lightweight cotton or knits.
- Confirm hoop size compatibility; most motifs scale cleanly between 3” and 5”, but check corner details at your target size.
- Inspect small lettering and fine lines—if your original file includes text (e.g., “A+”), ensure it’s legible at 3” height post-digitizing.
- Use proper stabilizer: cutaway for knits, tear-away for stable wovens, and mesh for sheer fabrics.
- Check black-and-white mockups—they reveal contrast issues invisible on screen.
- Compare light/dark fabric backgrounds in your design software before finalizing thread choices.
- Confirm licensing before selling finished products or reselling digitized versions.
Final Thought: More Than a Clipart Pack—It’s a Branding Anchor
The School Sticker Set isn’t flashy—but that’s its strength. In a market flooded with overdesigned, trend-chasing graphics, this set offers calm consistency. It works equally well on a hand-stitched nursery mobile, a boutique’s holiday gift tag, or a teacher’s personalized coffee mug wrap. It supports handmade product authenticity without shouting. And for creative entrepreneurs building long-term collections—think seasonal bundles, teacher appreciation kits, or back-to-school subscription boxes—it provides reliable, repeatable visual language.
Just remember: great embroidery starts before the needle drops. Take time with the files. Respect the fabric. Honor the craft. And let the School Sticker Set do what it does best—support your vision, not distract from it.